Final Touch Ups
Posted by
Paddy Leung
on Wednesday, October 14, 2009
Labels:
Demonstration,
News
/
Comments: (0)
darkmatters fb Fan Page! (part 2)
Posted by
Dexter Choy
on Thursday, October 8, 2009
/
Comments: (0)
Visit the facebook fan page here!
We're at 125 fans now! Thanks to everyone who became a fan, it means a lot to us!
We're at 125 fans now! Thanks to everyone who became a fan, it means a lot to us!
dakrmatters fb Fan Page!
Photo Shoot Part 2
Posted by
Paddy Leung
on Sunday, October 4, 2009
Labels:
Photo Shoot
/
Comments: (0)

Yesterday was another exciting day for darkmatters, we were fortunate to have such an awesome photographer to help us with the photo shoot for our toy. I met Michael Ching when I use to work in Blacks Photography. From the very beginning we instantly got a long at work and even become good friends. When I asked him if he was willing to do this favor for me he said yes without a doubt.
It was a pleasure to work with him, everything was very professional.It was the first time I've experienced a real photo shoot in a studio. Michael specialize in Fashion Photography but his product shots are just as skillful. Nevertheless, I'm very impressed and how well they all turned out.


Video Promo Sneak Peak
Posted by
Paddy Leung
on Friday, October 2, 2009
Labels:
Video Promo
/
Comments: (1)

Four hours ago we were all in Dexter's room filming a short promo for darkmatters toy. One of the found members of darkmatters, Jefford Lam was our super star for this film. Nevertheless, on behalf of darkmatters we would like to personally thank Amy Chan for helping us on this video project. We were very lucky to have her to make this special promotion film for us.


Here are some short footage of us filming:
PACKAGING DESIGN
Posted by
Paddy Leung
on Thursday, October 1, 2009
Labels:
News,
Packaging design,
Sketches
/
Comments: (0)


The night before I started to print the boxes, Teddy and I finalize the design together. Here is a quick line drawing i did for the packaging design, referenced by Jefford's x ray image of his teeth.


I was not prepared to print all 40 boxes would be so much work. On the other hand the packaging looks stunningly beautiful. Thanks to Leah's printing expertise I was able to finish them all in one day. It took use about 7 hours to finish them, without her help there was no way I could get them done on time.
Here are some more pictures of the box:


Painting Progress Pictures
Posted by
Paddy Leung
Labels:
Demonstration,
News
/
Comments: (0)
+ I've document most of the progress of making this toy on my blog but here are some sneak peaks of unrevealed pictures!
SEPTEMBER 14


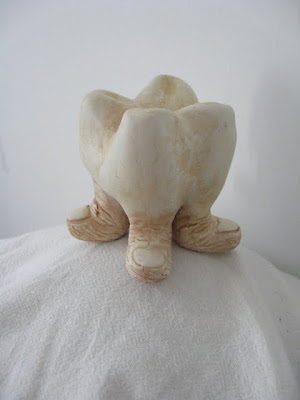
+ The first demo toy took about 4 hours to experiment with colours to mimic the teeth surface. I did some preliminarily researching of different kinds of teeth. This give me time to study what teeth really look like using pictures and even looking at Teddy's wisdom teeth as my references. I observed where the dirt naturally collects on top of the molar and how the colour is "off white" with a stain of yellow. Every part of the teeth was analyzed to create this little master piece.
SEPTEMBER 18


+ I tried different transition between the molar and fingers but I chose to focus on the teeth more than the fingers. The colour is very subtle but the amount of detail of the fingers really makes you look twice.
SEPTEMBER 14


+ The first demo toy took about 4 hours to experiment with colours to mimic the teeth surface. I did some preliminarily researching of different kinds of teeth. This give me time to study what teeth really look like using pictures and even looking at Teddy's wisdom teeth as my references. I observed where the dirt naturally collects on top of the molar and how the colour is "off white" with a stain of yellow. Every part of the teeth was analyzed to create this little master piece.
SEPTEMBER 18


+ I tried different transition between the molar and fingers but I chose to focus on the teeth more than the fingers. The colour is very subtle but the amount of detail of the fingers really makes you look twice.
update!
Posted by
teddy luong
/
Comments: (0)
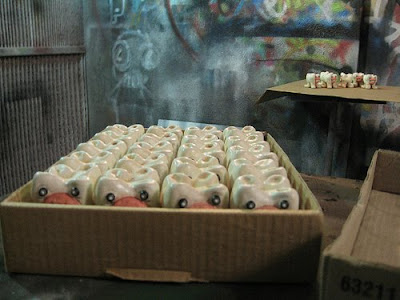
 blog updates have been long overdue! we've actually done a lot despite the lack of activity here. i'm showing here just a photo of the toys freshly coated with the base colour and lined up ready for paddy's detail work.
furthermore, i'd like to reveal our logos! a short and long one for different applications, special thanks to Calvin Yeung for the help. stickers are coming up, so keep your eyes, ears and all phalanges out for them! they will also be included inside each box, wink wink blink blink.
lastly! duh duh duh, our first figure has a name; nga4. confused? it's the cantonese pinyin pronunciation of the word tooth! the 4 denotes the intonation. follow this link and click nga4 to hear it: http://usa.mdbg.net/chindict/chindict.php?cdqchi=%E5%BD%88%E7%89%99#.
Dental Work In Progress
Posted by
Paddy Leung
on Wednesday, September 2, 2009
Labels:
Demonstration,
News
/
Comments: (0)

+ I started painting with model paints last week but it turned awful. I emailed Chris Ryniak for some advice and surprisingly, he replied back sooner than I expected. He suggested using just basic acrylic paint and spray a sealer for the finish. Here is an example of what I've done so far. The gums are not finished, but once it is done, I will post more updated pictures.
first resin cast!
Posted by
teddy luong
on Tuesday, August 11, 2009
Labels:
Demonstration
/
Comments: (0)
darkmatters is official!
Posted by
teddy luong
on Friday, August 7, 2009
/
Comments: (0)
After infinity billion forms and several hours later darkmatters is officially a legal business! Finally we are making some physical progress:
+ the first model is ready to mold and cast!
+ materials are bought
+ logo is coming up
+ website is under development
If all goes as scheduled we will be ready for launch on Halloween! Look out world.
*I can't wait to claim my first coffee as a business expense!!
+ the first model is ready to mold and cast!
+ materials are bought
+ logo is coming up
+ website is under development
If all goes as scheduled we will be ready for launch on Halloween! Look out world.
*I can't wait to claim my first coffee as a business expense!!
Ready to Cast!
Posted by
Paddy Leung
on Thursday, August 6, 2009
Labels:
Demonstration
/
Comments: (0)
Modeling Clay - DONE
Posted by
Paddy Leung
on Friday, July 24, 2009
Labels:
Demonstration
/
Comments: (0)


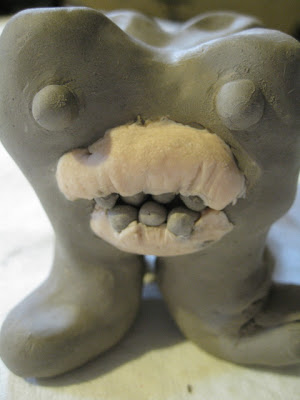
+ For the gums I used Fimo polymer modeling clay for better control and finer details
+ It took at least 2 days for it to air dry
+ Using inexpensive carving tools(could be found in art supplies or hardware stores) to do additional fine details
+ You can always re-work the dry clay by soaking it in water again
Modeling Clay Con't II
Posted by
Paddy Leung
on Sunday, July 19, 2009
Labels:
Demonstration
/
Comments: (0)
Modeling Clay Con't
Posted by
Paddy Leung
on Saturday, July 18, 2009
Labels:
Demonstration
/
Comments: (0)


